Thursday, December 12, 2013

Gnomon School Master Classes

Hi everyone!  While we are all getting into a full Holiday swing, I have been busy with tutorials and projects, working from building ice and tree shaders to Maya dynamics and Sub Surface Scattering.  I am really hoping to get as much out of this break as I can, and one of the things that has come to my attention are the Gnomon Master Classes for 2013.

http://www.gnomonschool.com/master/2013/
 
These 14 classes are taught by leading professionals in the industry in Visual Effects.  They've done everything from commercials to video games like Star Craft II and films like Gravity.  These classes last for 2 weeks, and cover a wide range of topics, with private forums and 2 hour long HD tutorials with over 28 hours of instructions.  I know this is a little last minute, but I figured it would be better to post this now rather than later.

The best part is, if you can't make it every day for the instructions, you can come back later and watch all the videos as many times as you want!  So you won't miss out on much if you have family obligations.

But in case you need more convincing, check out this video:


Remember students get discounts as well!  So consider this a great opportunity to get some master classes from veteran Visual Effects masters!

I will post more of my own stuff soon as well.

Saturday, December 7, 2013

Maya Dynamics

Well this last quarter, I managed to finish strong, with an A in all my classes!  As for my overall grade, let's just say I'm doing very well, but for me it's more about learning the material, gaining new skills, and networking.  I love helping other people with their work, so during this break, I am collaborating with other students to work on different films.  I will have to take a week long break later on for Christmas, but I hope by then to have made a lot of progress of these films.  I don't want to stop there either when the projects are done and the break is over... I want to continue to collaborate on my own projects (or other people's projects) throughout the year and even after I graduate in the spring.  Wow, spring is just around the corner and with it comes my graduation!  I can't wait, but I am eager to learn more.  I guess it's time to get that internship/apprenticeship and find a job!
Besides working on projects this break, I am also learning a few new techniques with different software like Maya and Houdini.  Because my film is going to involve particles, I am trying to learn some particle engines and dynamics in both Houdini and Maya.  While I have done some basics particles and dynamics in Houdini before, I want to see if I can do it in Maya, to keep everything in one package and allow for better integration of the elements of my scene.  If in the end it proves to be too difficult, I will move back to Houdini and find a way of composting the effects together.
So for now, I have a Maya dynamics (not nDynamics) with gravity and rigid bodies that allow me to crash a brick wall with a wrecking ball.  This is only a test, so it is not fine-tuned with any amount of mass controls or whatnot.  Many of the bricks slide unrealistically across the plane because of this, and the weight isn't dialed in so they move a lot, but this is only a test.  I do find it funny that one of the bricks hits the screen; it was completely unintentional.  I'll post more of these as I work on them, and in the meantime I am also working on some new shaders and techniques for a different film.  I am trying to make an ice shader and add subsurface scattering to a character, as well as a rocky texture and a birch tree.


Check it out here.

Monday, November 25, 2013

Book Covers

My next final this quarter is from my photography fundamentals II class, which focused on the digital side of photography, that being Lightroom and Photoshop CC.  Thankfully at our school, we get he entire CC suit for free as students.  Unfortunately, as soon as we graduate, it expires.  So while I have it, I'll use it.

Many of you may already know I am very familiar with Photoshop already.  I used to work at National Geographic doing image editing, everything from retouching to restoration and archiving.  I even managed to do some heavy compositing work for outside customers.  I also worked freelance for several years doing everything from cataloging to wedding albums and more.  So when I started taking a class on the fundamentals of Photoshop, I was skeptical I'd actually learn anything.  Well, I'm sure my fellow students got more out of it than I did, but I did actually learn some techniques and workflows that are very useful.

The hardest thing about this class for me was having to actually take my own photographs for everything.  Usually I'm handed a photograph, which already looks awesome because a professional took it, and I just have to make it look awesomer.  However, now I had to work with my own pictures, and discovered how hard it is to make something look good when it wasn't taken properly in the first place.  Several of these photographs turned out to be a little less than perfect, but that is why I am at school, to get better.  And once again I've learned a thing or two about taking pictures especially with the intent to take them into Photoshop to manipulate them later.

So for my final project, I had to pick 4 of the top New York Times Best Sellers and create new book covers for them.  I came up with 4 ideas, and 2 of them had to be redone (it's hard to go from a widescreen format way of thinking to a vertical book cover format).  The books I chose were Sycamore Row, Ender's Game (I do not support the ideologies or politics of the author), Identical, and The Racketeer.  These are not official, and only student work and I have no affiliation with the authors or the publishing houses or the New York Times.  I researched a little about each book to get an idea of what the story was about (I did not have the time to read the books themselves), and based my pictures off of that.

I will be posting more of my Photoshop work from earlier in this quarter soon.  So for now, Enjoy!


Saturday, November 23, 2013

Plant Shader

One of my final projects was to create a "shader" in Renderman for a plant.  The idea of a shader is essentially all the colors and patterns of a surface as well as the way the light interacts with it.  In short, it is a tool that the user adjusts that makes 3D objects look like what they represent.  So a rock will have a rock shader, a tree with a tree shader, and so on.  But in reality, these shaders are rarely so specific.  Most shaders are adjustable to look like a variety of things, and you can stack things on top of each other to change the look.  It gets really involved actually.  But to actually write a shader out by hand means you have far more freedom to make something look exactly like what you want, and for a very specific purpose.  As such, we were learning how to make an organic plant shader.  We actually had to go out and buy plants to study the patterns and figure out how to recreate the look with a coded shader.

I admit my shader is not as refined as I would like it to be.  I intend to take it further and add what are called "octaves", which is really just another level or two of detail, to really refine the shader.  I also want to refine the controls, but overall I am pleased with what I was able to come up with.  I would love to learn how to implement things like image based lighting and ambient occlusion into the shader, so I may have to study this on my own.  There is so much more to learn for shader writing, and I really enjoyed it so I wouldn't mind diving into this more.

So for now, here is a final render of my shader.  All aspects of it (including the interaction of light and shadow, the transmission of light, the backside colors, and so much more) are developed by me, and I hope to take it further.

Enjoy!


Monday, November 18, 2013

Painting geometry and MEL scripts (Poplate)

I just added a new post to my other blog, Last Light Film Blog, where I talk a little about a MEL script I made a few quarters ago which was designed to allow me to randomly place as many different geometry files on a surface while controlling various aspects such as collision detection and scaling.  Long story short, my script had too many bugs to use in my forest scene for my senior film, so i decided to use another tool I recently discovered called the Paint Geometry tool.  No this tool doesn't let you paint on geometry (there are plenty of other ways to do that already, I prefer Z Brush or Mudbox myself).  Rather, this tool allows you to literally paint geometry on the surface of any geo you want.  So you could paint 3D bears on a sphere, grass on a plane, or in my case, a forest of pine trees on a mountain.

I decided to use this tool but there are a few issues with it I still need to work out.  First of all, it allows penetrating geometry, which may not be a problem in my case since the trees are all far away, but I will have to spend the time to see if it is noticeable and fix it if it is.  It also only allows one geometry to be painted on, which means I had to repeat the process with a different geo to get some variety.  Luckily it also supports randomizing scale and rotation, and even translation, but it does each axis by itself.  This means I could potentially have a flat tree, which is not desirable.

So while I am still using this tool for now and have made adjustments to make sure it looks good, I have decided to still look into fixing my existing script, "Populate".  Populate will allow me to chose how many trees I want (or how dense I want it), how close together they are (for collision detection), select from as many ma and mb files as I want (and eventually obj, fbx, and alembic), and allow me to not only have random rotation on one or more axis, but also control random scaling in one of 3 ways, uniform scaling, diameter vs height (x+z vs y), or each axis separately.  I don't have to time right now to fix this... it is finals week, but during the winter break I want to take another look at this code and get a final fully functional version out there and then share it on here for anyone to use.

I will provide more documentation on Populate when I get the chance to refine it.  It does have some specific requirements for the importing geometry, and I would LOVE to have it use rib archives or even instances of an object instead of just geometry, to fit the user's needs.  For now, enjoy a screenshot from the opening shot of my final film (not lit or textured yet).


Thursday, November 14, 2013

ACM SIGGRAPH Student Chapter

Hi everyone!
As some of you may know, I am currently the Vice-Chair of the SCAD Atlanta ACM SIGGRAPH Student Chapter, and one of the things we are trying to do is peer-education.  As such, I am teaching a short workshop on Adobe Photoshop, specifically a brief introduction and then working with selection tools, masking, and layers.  With any luck, I'll briefly go over non-destructive workflow habits as well.  So for right now, I am posting a few images I found online that we will use for the workshop.  And for all the SIGGRAPH members joining for the first time, welcome!

So the first files here are all the images we used in the demo to go over making selections, masks, and working with layers and layer order.  I touched a little on the idea of adjustment layers, but there were so many things I would still have loved to show, I may need to do more demos later.

At the bottom you can see the final SPACE COW image.  I do not own the rights to any of these, I only found them on Google Images for use in learning Photoshop.  See if you can make a space cow...


Monday, November 4, 2013

Patterns and Tartans and Weaves, oh my!

Short post for now...
So back to the shader writing, I have finished a shader (which may still need editing) that has been inspired by weaves, tartans, and patterns.  I used sine waves to make subtle patterns in the background, diagonal lines, and layers and layers of stuff.
This was harder to make than it looks, plus it is editable in Maya so you can change things like the colors and the thickness of the stripes.

Enjoy


Tuesday, October 29, 2013

The Return of Photo Editing

So besides animation and visual effects, I've also been working on Photography, specifically Photoshop retouching.  Now I am very familiar with all the tools used in retouching in Photoshop, and I am familiar with many of the basic and advanced techniques used.  As such, I was worried I would be in a Photoshop class that would teach me nothing.  So far, while the class has been mostly review for me, I have learned a few of the more airbrushing techniques I haven't used before.  YAY, more to learn in Photoshop!

So right now, I have been learning portraiture retouching, working with multiple layers of edits and a variety of techniques that not only use a non-destructive workflow, but also provide flexibility to do edits I found tedious and difficult before.

So hopefully I will have 2 or 3 images to post soon.  I'll keep you all posted (I wanted to make sure everyone is alright with me posting them here before I do it).  And who knows, this could lead to some more freelance work or photography gigs.

Sunday, October 27, 2013

An Intro to Shader Writing

So lately, I've been learning how to do shader writing.  What does that mean?  Well for anyone who uses Maya (or any other 3D software), the shader is the thing that lets you apply a texture or color to your geometry, and interacts with the lights in the scene, such as spec highlights, diffuse, glow, incandescence, etc...  Lambert, Phong, Blinn, and Phong E are all examples of shaders.  What I am just starting to learn is how to write my own shaders.  Eventually, I can even set these up so you can plug in the variables for the Maya users to adjust, to make it user friendly.
Right now, it really just looks like a grid, well a weave at this point, which isn't like any other shader I just mentioned.  It has none of the light-interaction controls yet, and the other shaders don't control patterns like this one does.  However, this is just a learning tool.
It has been really fun to program so far, and there is still more to do on it, but I figured I'd post what I have so far and let people see.  I plan to add more colors, and maybe another pattern to this.  We'll see how it turns out.


In other news, I have been doing some serious Photoshop editing, but I'll go into that on another post.  The long and short of it is, I haven't really learned any new tools in Photoshop since I started, but I did learn some techniques I have never used before (which is what i was hoping to learn).  I kind of wish I could take their advanced Photoshop class to really dive into it.  We'll see.

Thursday, October 17, 2013

Snow globes

Just in time for Christmas.... oh wait, isn't there another Holiday or 2 between now and then?  Ah who cares about those holidays, we all know the only holiday that counts is the one where people spend the most money.  At least that's what stores seem to think.  Honestly I love Halloween and Thanksgiving, but for my latest project in my Renderman class (VSFX 319), we had to model snow globes.  While one girl in class actually did do a Halloween themed snow globe, I couldn't help but equate snow globe with Christmas.  So I decided to model Santa's Workshop.

The assignment was specifically to learn IBL (Image Based Lighting), which is a way of taking a very specific image (HDRI) of an environment and putting it in a scene, allowing the computer to calculate the lighting of the scene based on the values in the image.  It's kind of like taking an environment and putting it into your scene.  Sounds magical, but it is really not going to look right.  Imagine taking motion capture data and just leaving the raw data on the character and displaying that in a movie... it doesn't look good, trust me.  Animators need to adjust and tweak and fix the raw data into something that looks good and suitable for the character.  Just like that, I have to take this IBL and tweak it, add lights, adjust values, etc. to make the lighting look realistic like the object belongs in the scene.

We also had to use a specific Global Illumination technique, and actually got to play with 2 methods of it.  One uses Point Clouds to calculate illumination and occlusion, while the other uses ray tracing.  The point cloud based method is faster, stores the data to speed up processing later on, and developed by Pixar, but prone to inaccuracies.  The raytracing method is longer, but more accurate.  I used a hybrid technique where I raytraced, and then stored the data to speed up the processing.  It took about an hour and a bit to render these, but it was surprising to see some students with render times ranging from 20 minutes to over 4 hours!

I haven't quite dialed in the lighting all the way yet, and I am still working on the camera focal length (so expect more updates on this one later), but for now, I am relatively pleased with the results of my work, but I'm not going to leave it there.  For now, though, enjoy these three images.  Ho ho ho.


Saturday, October 5, 2013

SCAD Generate 2013

Hey everyone!

So I just finished a competition for art students here at SCAD Atlanta, called Generate.  It is a 24 hour challenge where each department gets sponsored by a different company and we have 24 hours to break into teams and create an original work based on their criteria.  They often give prizes, free food, and have a lot of fun.  We had trivia (which we were surprisingly bad at), which helped lighten the mood, and waaaay too many sugary foods.

All that aside, our team was part of the Visual Effects challenge.  But why is an animation major taking the VFX challenge you ask?  Well this year the VFX department added a Technical Direction challenge which was right up my alley.  Our goal was to spend 24 hours making an environment for a character.  We didn't need to include the character, but we did have to describe the character.  We had to include an element of animation and part of our project had to use Houdini in some aspect.  Our character was a woman named Fern who lived in 1945 in Paris, France.  She has been getting lettings from her husband, a soldier in the war, and the last letter promised to meet up with her at the cafe they first met at.  Fern waits for him at Cafe Maison, but he never shows.

Sad, I know, you can blame me, I came up with the sappy details.  And I did a ton of work on this with 6 other students, all contributing their skills to the project.  Nicole and I were the two Houdini artists, so we made a billowy smoke effect for a blown out candle on the table, but she really did all the work there.  I was mainly in charge of making sure the work got divvied out and shaded most of the glass work and such.  I was also the only one who had significant experience in Nuke, so I was given the challenge of compositing the project with literally minutes till the deadline.  I had a TON of fun, and we managed to finish a rather complex scene in JUST under the wire.

While I would love to say more, for now I will leave you with a single still image of one of our two shots.  I know it isn't perfect yet, but with a little more work (and a LOT more sleep), it will look amazing!  Enjoy!


Thursday, October 3, 2013

Readressing early work

I am interested in trying to re-work some of my earlier projects.  I was thinking it would be a great idea to remodel, texture, light, and render something I did toward the beginning of my time SCAD, and compare the two images to see how far I've come.  I haven't had the chance to do this yet, and I still have a class or two that I need to take to really make this look great, but I think it will make a great study.

The two images I am thinking about are from my introduction to 3D, "Forms, Space, and Lighting".  Right now all I can do is look at what I've done and think about what I want to do with it.  I think it may be a great segue into developing some more portfolio pieces on my own.

So here are my earlier works, an environment based on the character Harry Dresden, from the series of books The Dresden Files, by Jim Butcher.  For those unfamiliar with Dresden, he is an openly practicing wizard in modern day Chicago, who works as a private investigator.  It is adult, smart, well thought out, and entertaining.  Check out the books, and enjoy the images of his sub-basement lab.


Wednesday, October 2, 2013

Photography assignment 1

This week we went over our photography assignment in my fundamentals 2 class.  The class is really focusing on Photoshop, something I am incredibly familiar with already.  This first project actually didn't involve any Photoshop at all, but did go over Lightroom editing tools I wasn't familiar with, so I am glad to have learned them. 

My concept for this project was to explore the interplay of themes at the Davidson Arabia Natural Preserve, specifically the nature aspects versus the derelict man-made structures that still riddle the area.  For now, enjoy the images.


Teapots and Ribs. Yum!

This quarter I have been taking a Renderman class.  Well, it is technically PR Renderman (Photo Real Renderman), which is really just a production ready and incredibly powerful rendering tool.  It is used by a lot of large studios, and developed by (surprise) Pixar.

Right now, we are programming in scene description files, known as "ribs", which is like coding a scene by hand, geometry, lights and all.  It is actually rather challenging, but fun when you get used to it.  But it is slow, not fast at all, but knowing how the codes work is really useful.

Our latest assignment was to make a scene with a teapot, and some of the student's works were spectacular!  And yes, these were all HAND CODED (although we did get to use Cutter to help).  I decided to use this year's Renderman Walking Teapot toy I got from SIGGRAPH 2013 as reference, but the shapes were too complicated for me to figure out in the short time we had.  So I used it as inspiration, and made it my own.

The concept I had for this piece was to make it look like a toy tea set, since I used a toy as inspiration.  There is more I would like to do to this, but for right now, I am rather happy with what I have.  Feel free to leave feedback or comments!


Saturday, September 21, 2013

Ubuntu

So this quarter my classes include 2 challenging ones, which will focus on writing shaders and materials with code, and my senior film.  It also includes one that focuses on Photoshop for photography, something I am already familiar with but it gives me the chance to make something with my skills that is all my own!  So you can expect to see a lot of pictures this quarter, but also work in progress toward my film.  It is going to be chronicled better on the official blog for the film, so I will probably include more of my other work here, such a the work I'm doing for Michelle Ionescu's senior film which I will be providing a link to the blog here as soon as it is up later this weekend.

So that leaves my materials class, which is going to be filled with a lot of code and scripting.  I'm actually learning Linux so I don't think I will show any of that stuff, but I will talk about it some.  It is actually kind of fun to navigate in Linux.  We are using Redhat at school, and most studios customize whatever Linux they are running, so it is best to be familia with more than one flavor.  To that end, I have spent the last few days preparing my computer and installing the latest version of Ubuntu on it, a more consumer level flavor of Linux.  I actually set it up to dual boot, but now I have to decide how far to take this.  What software should I put on which side?  How can I take advantage of Ubuntu the most?

Well for now I going to be getting a lot of practice with Linux, so don't be too eager to see any materials and shaders work just yet, it will come in due time.

Tuesday, September 17, 2013

Fall 2013, SCAD

Well I took a bit of an hiatus during the summer, but I'm back, and ready to go!  The first day of classes started this week, and it is going to be an intense quarter.

First, I have actually been doing some work over the summer, collaborating with others and planning things out.  I did manage to finish one book, and start another (look at the Dresden Files), finished a slew of games, volunteered at SIGGRAPH 2013 as a Student Volunteer, visited Downtown Disney in Anaheim, and helped my brother move into a new house many states away.  I am currently working on putting together a collaborative short animation to do for fun, but the majority of the work will start next summer, since I now have a huge animation project to continue.

This quarter at SCAD, I am taking a Models and Shaders programming class, which teaches Pixar's Renderman, and i am super excited!  I also have a Photography class; always a good way to expand your horizons and get a different view of lighting and composition.  Finally, I am taking Senior I, which is actually the second out of 4 classes dedicated to working on the senior film at SCAD.  The first class was Concept development, followed by 2 quarters of production (Senior I and II), and finally finishing with Post-Production.  I am also helping a few others with their projects, trying to get more lighting and texturing/shading behind my belt.

Since we are starting actual production now, and I already have some people interested in helping with my project, I am using a free online tool called Trello to keep organized.  It works on any web browser, plus it has apps for my iPad and iPhone!  If you are ever working on a project, especially a collaborative one, check it out!  It even connects to Google Docs and Dropbox.  I am also creating a new blog to chronicle the development and production of the short.  I have added a new tab to my blog, but you can also check it out at LastLightFilm.blogspot.com.

So for now I will leave you with a picture of a lantern I've been working on for another senior project by Michelle Ionescu.  I'll post a link when I get one from her.  I mainly focused on the glass, getting a bumpy frosted glass feel.  Enjoy!


Saturday, July 27, 2013

SIGGRAPH 2013 at an end

Well this is it, the end of SIGGRAPH 2013.  The last day was actually Thursday, and there were tons of last-minute attendees.  I was surprised to see so many interested people showing up at 2pm for a  convention that ended at 3:30.  The SVs had a final get-together or two after everything was said and done.  I was really amazing.  The entire conference was really impressive, and I learned and did a lot!  And yet, I didn't get to half the events I wanted to.  Still, this was one of those life-changing events, which I will always cherish.  I am definitely volunteering for SIGGRAPH 2014 in Vancouver.  Yesterday, my friend Eric and I went to Paramount studios on a tour, which was a real treat.  I also (finally) got to eat at In N Out Burger, which is my favorite burger joint in the world, and for good reason.
So now I have said goodbye to all my new friends, for now, and plan to keep in touch with as many as I can through twitter and Facebook and my blog.  I can't wait to see everyone again next year!  So here I am at LAX waiting for my flight.
PROUD TO BE SV!


Thursday, July 25, 2013

SIGGRAPH 2013, Day 6 Morning

I didn't get up a post yesterday, but a lot happened. I got to talk with some recruiters at Disney who told me what work they'd like me to develop over the next year in order to get into the company's apprenticeship program.  I also got to explore more talks, including one for EPIC which I enjoyed. I also worked a shift and explored the exhibition hall.  Not to mention seeing a flying moon in the main lobby.  At the end I the day, the student volunteers got to see a demonstration of SIXENSE technology and had a fun party.  And of course there were tons of private party events we kept hearing about... I've fitting get an invite to one of these sometime!
And now today is the LAST DAY of SIGGRAPH 2013.  This is my only chance to get swag from the Pixar booth (sadly I don't have the time to get a teapot), and then pick up some books and maybe a shirt or DVD before I'm back on shift and then tearing down.  Keep an eye out for more twitter posts (found on the side of this page if you aren't using the mobile site).

Next year in Vancouver!

Wednesday, July 24, 2013

Day 4, SIGGRAPH 2013, Night

Another day comes to a close.  Today was the first day the exhibition hall at SIGGRAPH was open, and boy was it busy!  At first, I was asked to assist with registration, but since the registration area was so crowded, they decided to make a remote registration area for pre-registered users where they could get their badges quick and easy.  We were crowded for about 4 hours and helped countless people.  Immediately afterwards, I got to help out in the studio, where I was assigned to work with the Epson print station.  They had a table with computers on it where users could bring files they could print out on a variety of papers on several different printers, including large format printers that could handle canvas.  Ah... Just like the old days at National Geographic when I would often print on HP and Epson large format printers, using high quality papers and canvases.  Of course I was right at home, and loved that anyone can come up and print anything they want for free!!  I am totally taking advantage of this tomorrow, if I can get a hold of one of my larger files.
After that, I explored the exhibitors hall.  WOW is there a lot to do and look at.  I can't even go into it all, but I was very impressed with everything in the hall, and enjoyed talking to a lot of the exhibitors.  And of course there is the job fair.
This was a great day today, and I can't wait for tomorrow.  SIGGRAPH is going by too fast, can't I slow time down?

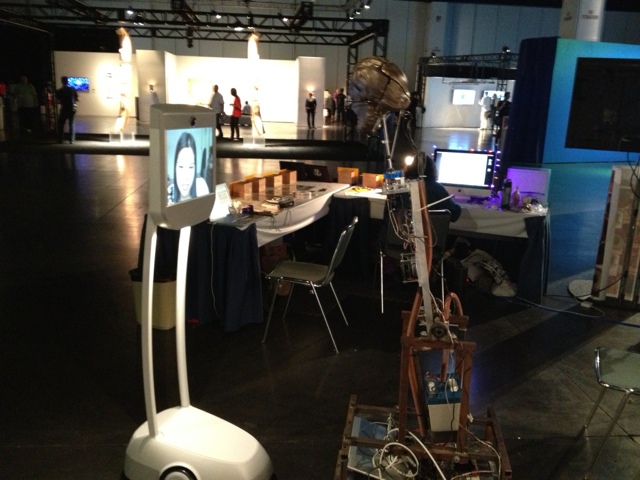
I will leave you with this one image.  While I was in the Studio hall, I witnessed a remote controlled robot talking to an AI controlled robot... I was indeed a Kodak moment.


Monday, July 22, 2013

Day 3, SIGGRAPH 2013, Morning

Hello again everyone!  Ready for day 2 of the convention??
I have to say this has Ben very exciting for me.  In the past, I never would have dreamed of actually meeting the people who make dreams into reality.  At my school, SCAD, I have a special opportunity to meet professional artists in the industry once or twice a quarter.  But at SIGGRAPH, every day is like that.  You never know who might be waiting in line for food begin you, who might be sitting next to you at a talk.  Everyday I have bee meeting amazing people, artists and programmers and dreamers, who all share the same vision, a love for computer graphics.  I feel that this convention is the most influential thing I have ever done, and it really gets me excited to be surrounded by such supportive and talented (and awesome) people, both professionals and students.
I is true what they say, we are the future of the industry, and I can't wait to get started!

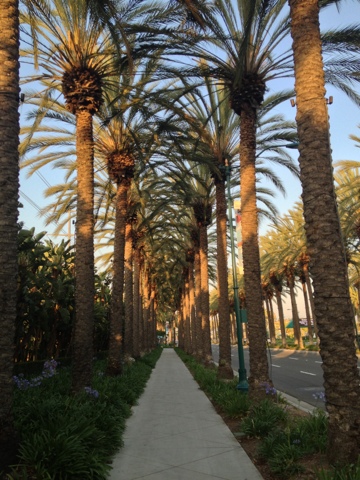
That and Californian is so pretty I just love walking to the convention everyday!


Day 2, night

Hello again!

Well today has been jam packed at SIGGRAPH!  I got to check out the geek bar, where you can watch whatever presentations you want and switch between them on the fly, all live!  Great if there are several presentations you want to see or are undecided.  I also got to see a special presentation of Pixar's Blue umbrella.  To hear Saschka Unseld's speech about what inspired him to make the film is inspiring.  He makes me want to go out right now and start working on things that I've been wanting to work on... But first I have to finish the rest of the week here before I can work on something... Not that I'm complaining.
I spent a few hours in the Studio hall where I got to check out 3D printers and scanners, art, really innovative technology from Exo-skeletons suits to haptic technology.  I even made a holographic keychain with my friends.
Finally I got to look at a presentation showing off all the talks this week, and WOW!  I wish I could see them all, they are so fascinating, now I need to decide what to watch.
Tonight is a big SV Alumni reunion, time to mingle!  Tomorrow... I work bright and early!

Sunday, July 21, 2013

Day 2, SIGGRAPH 2013, SV, morning

David Hixon
Senior BFA, SCAD Atlanta
 
Today is the FIRST Official day of SIGGRAPH!!  Welcome to all the attendees!!  We student volunteers are really excited to see you all here, and it looks like good turn out!
So today is my one day off, and I am planning to have a lot of fun today, and going to many events as I can.  First, I'm kicking off the day with a presentation of PIXAR'S Blue Umbrella!
The lights are dimming... Lets get the show on the road!

SIGGRAPH 2013, SV Dat 1, night

Well the first day is over, for volunteers that is.  For me, I had an early shift, which lasted several hours and involved lots of bag-stuffing, but I got to meet a lot of cool people, mostly fellow volunteers.  Later in the day, we had orientation and a tour.  Finally we had a special treat, where we got to listen to the stories of several industry professionals who told us about how they made it intothe industry   themselves.  It was really a great pep talk not just for the conference, but for our futures.  They talked about several topics I really care about, such as older students entering the field, and tips on networking, among other things.  A few lucky students walked away from the presentation with some cool prizes, like a computer and awesome graphics cards, but for me to hear the presentation and get their stories really excited me more than any graphics card would (although they were pretty sweet).  After that, we all posed for a group photo, even though it was starting to get dark out, and had free pizza and drinks afterwards.
But the best thing about today was getting to meet with and talk to so many talented and interesting people, all with similar passions.  Even though they aren't professionals yet, every one of these student volunteers could become a friend, a partner, a boss, or an important asset for networking.
For now, I'm off to bed.  I get the day off tomorrow and I don't want to miss anything the conference has to offer!


Saturday, July 20, 2013

SIGGRAPH 2013, Day 1, morning

Hi everyone!  For those who don't know me, my name is David Hixon, I am a senior at Savannah College of Art and Design in Atlanta (SCAD), where I am majoring in a BFA in animation, although I already have anBA in Digital Art from George Mason University (GMU).

So today is day one of SIGGRAPH, at least for student volunteers.  We have to get trained and signed in you know.  So after doing all the online training and such, I'm here for the real thing.  I am super excited to meet people for the first time and eager to get started.  I have a lot to do, so I will post more later tonight!

Thursday, July 18, 2013

SIGGRAPH 2013, Here I Come!

So for those who don't know, I will be heading off to SIGGRAPH 2013 (Special Interest Group for Computer Graphics and Interactivity), as a Student Volunteer (SV), which starts tomorrow!  Well actually it starts Sunday, but I am arriving Friday so I can volunteer in their bing on Saturday followed by training on Saturday.  This conference is an entire week long, and with all the post conference events for SVs, I won't get back till Saturday.  So I will be checking in on here every single day to give a rundown of everything happening at SIGGRAPH, or at least from my perspective.  I look forward to meeting all the fun cool people, both professionals and volunteers, and can't wait to get started!  There are butterflies in my stomach, or maybe that's the pizza I ate...

Stay tuned for more!

Thursday, May 30, 2013

Shaders and Textures Final (TECH 311), part 1

Another sleepless night, but that is expected during Finals week at SCAD.

Today, I have for you all my final from my Shaders and Textures class.  In short, this is a class that teaches how to make objects looks really cool with textures and a realistic reaction to light.  So you'd think the final project in this class would involve making some photo-real objects, but it isn't.  In fact, it is quite the opposite.

Our final was to use a non-traditional shading technique to make something that looks 2D in a 3D world.  We aren't talking toon-shaders, but something more advanced.  Our in class assignment was to make it look like a drawing, and still have a reaction to light.  As you can see here, the sketchy pencil marks really help make this scene look drawn, but it is in fact 3D.

So for my project, I decided to do a painting.  Specifically, I wanted to make an homage to one of my favorite artists, Vincent van Gogh, and his most famous painting, Starry Night.  In order to make this project, I got the assistance of my beautiful wife to help me literally paint with Acrylics (because I don't have nor know how to use oil paints) onto Bristol board and scanned into a computer.  I then manipulated the scans, adjusting colors and tiling the images and such.  From there, I input them into Maya, did a lot of adjustments, and placed them inside various procedural textures which add a lot to the render to make it look like more than just a bunch of flat strokes.  The scene I chose to do is, in fact, a direct homage to Starry Night, which is not as well-put-together as I would like, but I will play with that later.

I am also working on animating this scene with a camera pan through the painting.  I tried this already, but I forgot to bake in some of the textures, which messed up the sequence.  Once I fix this as well, I should have a pretty cool short flying out of a painting.

So for now, enjoy my rendition of a 3D Starry Night.


And now... SLEEP!

Wednesday, May 29, 2013

Composition Final (TECH 420), version 1

Hey everyone!

I have 2 finals down, and (and a half) to go.  Why a half?  I have to take one of my projects and do a simple breakdown, but that's for another post.  For now, I have finished my final for my Compositing for Technical Directors class, which has been teaching Nuke, as I mentioned before.  Our final project was to take an existing live-action plate, which is essentially just a video taken of an environment (in this case) with the intent of adding a CG element to it later.  The CG element we could add was our choice, and I decided I wanted to do something a little different.

In the end, I am not satisfied with the level of detail the model is.  While I did a LOT of work to make it look better, including displacement, specular highlight, specular color, and more, which I did in Mudbox, Maya didn't properly import anything, and I had to fight with it to make it look halfway descent.  However, as a result, I spent to much time trying to fix bugs and errors that I had to stop fixing minor problems and get to the point of the project, which was to integrate the object into the scene.

A LOT of work went into this, but too late I ran into a bigger bug that I've seen before and couldn't figure out.  I'm not even sure how to describe it to get help, and I didn't have any time left to try to repair it or even remove it.  If you look at the object in my scene, it has a sort of polygonal look to it, but I assure you this is a smooth model with no polygonal edges on it.  The problem is the displacement I used fell apart.  I've seen this before, where my displacement lost all definition and became a mass of polygons on the surface that no longer even tried to retain it's original shape, but it only shows up on high resolution renders, so none of my smaller test renders caught it.  So I am NOT giving up on addressing this challenge.  I WILL fix this, and then I will post it.

So for now, enjoy my little scene, and again, if you have any feedback on how I can integrate the CG elements into my scene better (and please refrain from mentioning the texture, polygons/displacement on the object, or the clipping yet because I am already addressing those), I would appreciate it.  Ta ta for now...

Monday, May 27, 2013

Photography Final

So today, I delivered a presentation for my Photography final.  In short, my assignment was to research an existing Photographer, and as I mentioned n a previous post, I decided to research Michael Eastman.  Specifically, I decided to try to capture the feel of 2 of his projects, Urban Luminosity and Vanishing America.  My project is called City and Country, and is meant to show a contrast between images of the city life and country environment.

For the City side of my project, I took pictures around Atlanta, including the beautiful Hyatt Regency hotel, and outside The Loft.  In all, I took about 160 images of this set, but for the final project, I had to choose 5.  I already posted several favorites that didn't make it into the final project, and I may add some more later.  These images were all designed to focus on the transmission and reflection of light, with a low ISO for high quality, and long exposures to catch as much detail as I could.

For the Country half, I went to Pendelton, South Carolina,  where I visited the historic areas and went off the beaten path to a few other areas, including an old train yard that was falling apart and covered in rust.  It was my favorite place to take pictures, but I started to run out of time as the sun was setting and the last few images got too rushed.  In the end, I took over 200 images from Pendelton, and chose 5 for my final, although I will post more later that really loved but didn't make it into the project.  These images mainly focused on the textures and wear/aging of the objects and locations.

I did do Photoshop editing to these images as well, to try to match the aesthetic Eastman uses, or something similar at least.  For his Urban Luminosity, he would saturate colors, clean up the dirt/debris (but not completely), and present a clean and vibrant image with patterns and colors boarding on the edge of abstract.  I cleaned up the majority of my City shots where I removed distracting dirt/debris, while enhancing colors.  For Eastman's Vanishing America images, he would often darken and enhance the sky, desaturating it while increasing the contrast and details.  Other than working with the sky, I would apply a slight desaturation (using an adjusted "Black and White" adjustment layer at low opacity) and bringing details back into the highlights of the image.  There is a huge advantage to working in 16bit with camera raw, which allows for HDR images and really pulling in the details lost in shadows and highlights.  While none of these are actually HDR in my final, I did bracket my images which will allow me to get HDR out of them, and I did work with HDR on a few that didn't get into the final.  I will be presenting more of these later.

Enjoy!