Saturday, May 25, 2013

Soul Front

Hello again everyone!

I just wanted to tell you all about a project I've been helping out with for the ITGM (Game Design) guys.  Some of them approached the production club, looking for help with animation.  That's one of the nice things about SCAD is that you always meet students from other disciplines, related or unrelated to yours, and can collaborate to make a better project than what you started with.  For example, photography students will often meet with fashion majors to take pictures of the models wearing the fashions, to not only fulfill requirements they both need, but spread publicity for each other as well.  Well the same is true, maybe even more so, between Animation majors, Visual Effects majors, and Game Design majors.  While the game design guys aren't all in this building as often as animation and Visual Effects are, they do have their own little gaming lab where they test out games, and they have several classes in this building, so they are often around.

So the long and short of it is that a group of game design majors came looking for animators because they knew their animations weren't that great, and didn't have that time to finish the animation with them more important programming and testing they had to do.  That's where I stepped in.  With help from 2 other animators (Raymond and Andrew), we were able to put together new animations for all their characters.  With 4 characters, 7 animations each, plus tweaking and additional animations, we had a lot to do.  We haven't quite finished yet, but the animations are almost done.  Right now all the blocked in motion is there, and some tweaks are needed, but so far we have what we need for them to continue.

The game is called Soul Front, and it is a real-time strategy game where you control 3 characters (out of a choice of 4 archetypes) that you match up against another player (or a computer) with the same set up options as you have.  No out-leveling opponents here.  This is actually designed to be a mobile platform game, to work on the iPad and I believe Android.  Specifically, I coordinated the animations, working with Raymond and Andrew to decide what each character should do.  I then animated throw animations for each character, stunned/dazed animations for all of them, the attack and victory for one of them, and will probably be doing tweaks on many of the animations already finished in the future.  I will give more details about my role in this when the game is closer to a release.

While it is still in the works and might not be available for download yet, you can see their blog at SoulFrontGame.com.  Please check it out and make sure to check their Facebook and Twitter pages too for more updates.  I will also update here when the game is available for download.

Sera

Well I'm smack dab in the middle of finals, which is why I haven't updated in the last week.
However, I do have a lot of new stuff to show, and more coming soon.
So for now, since I am so busy, allow me to show a project I have been working on in a program called Mudbox.  This is like ZBrush, but easier to use.  This is not an in-depth look at either program, but it did help give an idea of how to do such a technique and where to go from here.
I decided to model a triceratops.  The original base model is one found in the Mudbox community, what I did was literally paint the 3D texture, color, specularity, and everything else, onto the model.  It is a technique called Texture Painting, and uses something called Displacement Maps, which I combined with Bump maps to create my image.
While I did bring this into Maya to render using Renderman, it wasn't as successful a transfer as I would have liked, so I am showing the mudbox file for now until i can get the renderman render to work properly.
I plan to go back and "dirty" it up a bit, and make more adjustments.
Enjoy!

And yes, this is based on the Triceratops in Jurassic Park.

And yes, I did name it "Sera" after the Triceratops in Land Before Time.


Friday, May 17, 2013

Finals already?

Hi all,

My lack of recent posts isn't a sign that I'm giving up, but it is a sign that finals are (already) here.  I have some good stuff to show, plus I'm working on taking more pictures this weekend and some more digital art.  This quarter has seemed to go by so fast, but I guess that's normal.
So for now, I am waiting to go into a museum for a class trip to look at renaissance art (yay!) and I'll post more this weekend.

Stay tuned!

Monday, May 13, 2013

Photo Preview

Today I have for you a preview of my final project in my photography class.

The final project in this class is to take a photographer (or other artist), and either try to mimic their style and work, or improve on it.  Since I would rather learn from others, and not show them up, I chose to mimic a photographer.  After much searching, my wife and I found Michael Eastman.  Michael Eastman began taking pictures in 1972, and his work is really impressive!  He has done a series of different subjects, from Americana to horses to abstract to Cuba.  His images have a certain aesthetic appeal I really like, and I find that his study of reflective, refractive, transmitting of light in a city at night is intriguing, bordering on abstract, but with a certain sense of place.  You look at things you see everyday in a new way, or at things people never notice at all that's right in front of them.

Usually his images are of textures and play of light.  I have to wonder how he gets into all these places, but I really enjoy his work.  I spent the better part of a weekend (with some planning beforehand) taking pictures around Atlanta.  Here is a preview of some of these images.

I will also be using a similar aesthetic to follow is Vanishing America series, contrasting the big city with rural country.

In the end, I have to pick a grand total of 10, so that's around 5 for each study.  But what I really care about in this is keeping consistant with te aesthetic and building some good photography samples for my demo reel.

Enjoy!


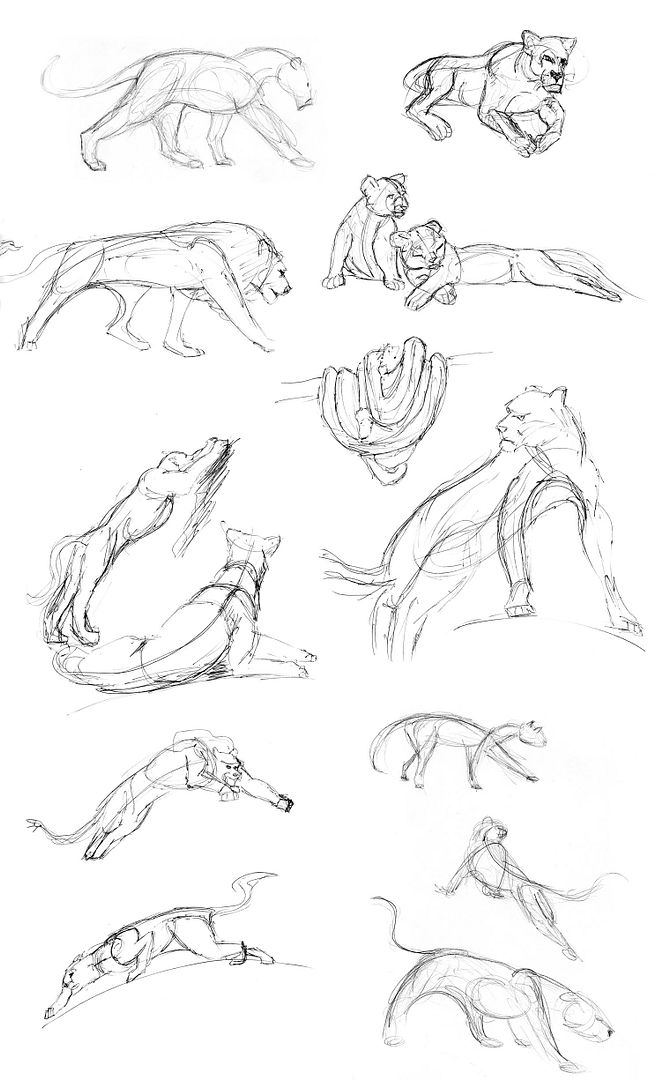
Animal Sketches

Today is a short post.  I leave you with some simple sketches of some animals I made a few months back.  Enjoy!


Saturday, May 11, 2013

New images soon

Just spent a day working on mudbox, compositing files together, and taking pictures around the city at night.  I'll have lots to show soon but for now, I'm beat!
Stay tuned for all of this plus a book review and more reviews of movies!


Wednesday, May 8, 2013

Bombs away!

So many possibilities with the name of this entry...  Duke Nuke-em, Drop the Nuke, Ground Zero, Nukes Away, To [insert enemy country here] With Love... you might notice a theme with them.

Today I want to talk briefly about Nuke, the compositing program by The Foundry.  In short, this is the program that most companies use to put all the different elements they create together.  It is also where they can add certain affects, which were impossible or unsatisfactory before this point.  For a long time, the industry mainly used Shake, owned by Apple Inc., however, it was discontinued in 2009, and while some studios still use it, it has mainly fallen to the wayside and Nuke is taking its place.

For most people, the closest thing to Nuke they will use is Adobe After Effects, which will allow you to do many of the same things as Nuke, but not nearly as robust or thoroughly.  After Effects mainly works with layers, much like Photoshop, giving the ability to place layers of effects over each other and blend them together.  However, this is actually very limited, and in the end, a Node-based network, like Nuke, is much better.  Both Nuke and Shake use node-based networks, much like Houdini as well.

The work I have been doing on Nuke is actually very fun.  I often have to go into Maya and separate a scene into passes, rendering only one portion of the image, from a specific object to a light, or even a mask, and then take these parts into Nuke, where I have to put them back together.  The advantage to this is that I can manipulate these elements in ways that are impossible or very difficult in Maya, giving me more control over my image.  These can be big changes, such as an overall hue shift for the entire scene, or something much smaller, like a tiny detail of an ambient shadow on a specific set of grapes.

Often, the node network will get rather cluttered, so it is up to the compositor to keep their work space organized, so when/if others have to work with it, they can understand with certain ease what all is happening.  I have heard horror stories about expert compositors who leave such a messy pile of spaghetti they call a node network that it literally took days to go through when handed off to someone else.  So recently, I have been working on keeping my networks organized and orderly.

Here is an example of a node network for a scene I am working on in one of my classes.  I did not make any of the scene itself, only split it into parts and composited it together again, adding ambient occlusion, color shifts, glows, etc.  While you can't see the names of the nodes at this distance, trust me when I say you can zoom in and see the names of every node easily identified.

Enjoy and keep pixellated!